Sunday 30 November 2014

The fourth wall

Like a theatre, a dollhouse takes away the fourth wall. We must be able to peep into the miniature world. Different dollhouse designs offer different solutions. My retro house, for instance, can be opened from both sides, the roof can be taken off, and the upper floor can be removed. My Playmobil house had no back wall. But most dollhouses have an open front, with or without protecting doors.

I have come to the stage in my work on the basement when I have hinged the fronts. Fronts allow some additional space for display; you can even make a separate fake room. For the basement, I have chosen to have natural fourth walls. But this is the last and only time when these can be viewed as walls, from this angle:


Working kitchen


Best kitchen

When I have put on the roof, the only way to see the fourth wall will be when the front is open:


The wall allows to display the array of kitchen utensils I made eight years ago for my very first kitchen (so far, white-tacked). I am still very proud of them. This way, you can see them much better than inside a crammed room.

Saturday 29 November 2014

Finishing touches on the secret corridor

I spent the whole day today on the secret corridor. I had made slow progress on the staircase in the evenings, and yesterday I finally glued it on. Of course as soon as I did that I saw clearly that it wasn't as perfect as I had thought, but it's too late now.


I made the lamp shade from a bottle cap. This is as much or as little that will be visible through the door. However, both ends of the corridor can be seen through the side windows. It's almost impossible to take a good picture, or any picture, but I promise, it looks just as mysterious as I want it.


There are two pictures on the wall, and of course there is a cat at the bottom of the stairs. I have tried rugs, but space is so tight that a rug killed it. But I did put in a bit of skirting, even if it's just barely visible, and there is a proper newel post.

From the opposite side, there is this wonderful under-stairs space, far too small to make much of. But enough to put in a chest of drawers. I first tried a simple white one, from my supply of Poundland furniture. But it felt too plain. I painted it green, same colour as the walls, and then distressed it with a coat of lighter green which I wiped off with a cloth. I used bead fittings for handles.


Now it looks sufficiently worn-out (maybe slightly too worn out, but it will only be visible from the side).


The light is temporary, "borrowed" from the kitchen, just to test the effect.

Now you may ask, why do I put so much energy into something that won't be visible except if you know where to look? It's a bit like writers putting in family jokes into their books. Or painters putting the same tiny detail in every painting. Nobody will notice, unless... But I know that there will be at least some keen eyes who will discover the secret corridor, and for them, everything should be done properly.


Sunday 23 November 2014

Side effects

This weekend I was hoping to finish the basement, at least finish the secret room and put lights in it. I am working against time. In two weeks I have my annual pre-Christmas party, and no matter what I will have to move the basement from the dinner table. And from the dining room. The only place I can move it to is my study, which doubles as a guest room, and a prolonged guest season is imminent, which means I cannot put the basement in the middle of the room. It has to go under the main house which takes too much space as it is. At least I have glued the basement so I can move it in one piece, but I hoped it would be finished, or almost finished, because I much prefer working at the dinner table than lying on the floor on my stomach. Once I have moved it and put the main house on top, will I want to dismantle it again?

However, I am afraid that I will not meet my deadline. Firstly, after I had for two weeks been absolutely sure that I would have a chest of drawers and a mirror in the secret corridor I am now back to the idea of a staircase. And making a straircase is more complicated than putting in a mirror. Making a staircase is one of the greatest challenges of dollhouse construction, even if you make it from kit, and I am not doing it. Through the rear door, only a small bit of the stairs will be visible, but from the side window it will be in full view so I need to make it properly. I have made several straircases, and I remember some tricks, but it isn't something you can do in a hurry. I have done some preparations, but it will have to be next weekend. Meanshile I have tested lights.

I may have said already, probably repeatedly, that I am not good at lighting. I had quite a sophisticated light system in the Victorian house which I hope to replicate in the new project, but lights is one thing about dollhouses that I don't enjoy doing. I like the results, when it works, and I am proud of myself when I have solved a problem, but it's simply too much trouble. Therefore, when the first battery dollhouse lights came some years ago I was delighted that my problems would now be solved for ever. Alas! I bought a set of lights and was truly disappointed because they were too dim and didn't look natural, even the "amber" variety. I learned how to soften LED lights when I finished my van Hoogstraaten room box, But I have tried this and that with battery lights in various projects, and I cannot make them work. At least not the way I want.

The other day I bought a set of battery Chrismas lights in a thrift shop. For a pound, I thought, I could experiment. It would be such a relief to have the basement lights without all the drilling and wiring and the tiny plugs and bulbs.

I tested the lights, and I didn't like what I saw:


Even though the picture shows the lights more blue than they are, they still don't look natural, and even though I have five lamps in this one room it looks far too dark. When I have invested so much in this project, I don't want to compromise. I am simply not happy with this solution.

I gave it another chance though. I painted each little lamp yellow, which made the light softer and less artificial. Yet it still looked like Christmas lights (which they are). Victorians wouldn't have such lights anyway. They would have chandeliers, sconces, table lamps. In a modern house perhaps...

And then I realied that I have a modern house, and I have a modern house where standard lighting is impossible, but a set of battery lights might work.

I have so far just fixed it with tape, but I have by serendipity found a solution to a problem that has haunted me for years.


Sunday 16 November 2014

A decisive step

Believe it or not, but this morning I dismantled the basement again and THEN I GLUED THE EXTERIOR WALLS. It needed some negotiations, involving a craft knife, but it's done, and it feels like the first real accomplishment. (I am sure I will discover soon that I did it all wrong, but I am not going to worry about it now).


So the exterior walls are in place and drying, and meanwhile I worked on the interior walls, putting in doors. I added door knobs to all doors, which of course took me less time than the first one, and then I started figuring out how to fix the doors. I discovered that there was a little detail that I hadn't painted, which was a nuisance, but easy to repair. Then I realised that in the rooms where I will have wallpaper it makes sense to put in door frames after wallpaper, to make neat finish. Fortunately, already yesterday I made a roll of splash wallpaper.


Frankly, I don't remember where I learned about this technique, but I had this paper already in my very first house, all the way seven years ago, and then I had the same in the Victorian cabinet house.

I want to use the roll over three walls without seams. I started with the interior wall that has two doors.


Then I realised that I was running out of time. Since I don't have a dedicated hobby room, I need to tidy up after my weekend exercises. I put in the interior walls temporarily again, and then put in as much objects as I had the energy to do. Unless you know, it looks exactly like three weeks ago. 


But the exterior doors are glued, all rooms have floors, the windows are in, almost all doors are in place, the secret corridor is finished (although I may still decide to have stairs), and I really feel that I have made considerable progress this weekend.

I put the roof on top and took a picture with a flash. It made me think that I need to plan lights carefully for this project.


Fellow miniaturists often ask what glue we use. I used wood glue for the walls, and I pasted the wallpaper with superstrong all-purpose glue stick.


Saturday 15 November 2014

Door knobs

Apart from an infinite number of windows, my house has nineteen interior doors. Doors are not really necessary in a dollhouse, and they take a lot of space, but they certainly add to the natural look. In theory, your dolls should be able to walk from any room to any other room.

Doors are almost as boring to paint as windows, but you can so some interesting thing with them. Some of mine will be stained rather than painted (or so I think at the moment). Some may be other that white. I have distressed the four doors in the basement by painting a thin layer of green on top of the white and wiping it off immediately with a cloth.

To look natural, doors need door knobs. I am not going to pay a fortune for door knobs from dollhouse suppliers, and I have already tested some intresting methods in my previous projects. I had a vague idea what I wanted for the basement doors, and as I rummaged in my nail och screw cabinet, I saw a perfect solution.


I found these brass screws that I have no idea where they come from (and that possibly cost more than dollhouse door knobs). I bit off the top of the screw, drilled a hole in the door and fixed two knobs on each side. This is what it looks like in its environment - the door frame still unpainted.


I will have the same door knobs for all doors in the basement, but I have many other ideas for door knobs that I will implement. Luckily, there are so many doors in the house!

Moving on

I wasn't quite honest when I said in my previous post that deviations were merely rewards for doing boring tasks. It is, as all teachers know, a better strategy to vary tasks so you don't get really bored and frustrated. But another reason is that I want to see some progress, something that I can proudly display and share. Yet another white wall or yet another set of window surrpounds doesn't feel much of a progress or something to share. But a front wall like this one is:


Therefore I have made this front even though it will take some time before I can put it in. It fact, this is the last (!) of the thirty five windows (except for dormer windows which will probably not happen until next summer so I won't worry now).


This morning I dismantled the basement for the fifth time.


The reason is that I feel I am getting closer to the final assemblage and glueing. But before I do that I need to finish all work on flat surfaces.

When I started this project, I consulted my facebook groups concerning the principal technique: glue first and then decorate or decorate before glueing. Not suprisingly, opinions differed, and both sides offered persuasive arguments. I followed my instinct, and I guess I will soon know why I was wrong when all my decorating gets damaged during assembly. But having done some other projects I know how much easier it is to work on flat surfaces. Imagine doing this inside the limited space of an assembled room:


Of course you can ask why I am doing this in the first place. This is a meticulous task - yes, I am cutting the 0.5x0.5 cm tiles one by one and pasting them on one by one in a diamond pattern. It takes ages. I could have left the walls white. I could have bought a border. But I enjoy the process as much as the result. (I used to do throwing, and although the results were mostly pathetic I enjoyed doing it immensely). And the result is unique. I promise: there will be no kitchen like this in any dollhouse ever. Unless, of course, somebody copycats me. But then, I have aged the walls with tea, and no one can copy that shade exactly.

There are some things left to do before I can start. I need to fix door frames, again because it's easier to do on separate panels. It means that I need to fix the door knobs first. To see how I am doing it, please read the next post.


Friday 14 November 2014

Front door

Another small project I have done as a distraction from the neverending window painting is the front door. I have bought this outrageously expensive front door, and I wanted to do it right. I had a vague idea that I wanted the door to be dark oak, but the problem with oak stain is that once you have applied it it's almost impossible to change, and I couldn't afford to make a mistake.

As usually in these cases, I consulted my facebook groups. As sociologists know, the answers you get depend on the questions you ask. I asked: What colour do you think the doot should be, white or dark or dark with white surrounds?


Guess how many different answers I got? Most voted for white, but there were many great suggestions, and many pictures. Interestingly enough, there were different trends in different groups. Can it be culturally dependent?  Anyway, I wasn't wiser after that, but then one clever person said: Why don't you cut mock doors from cardboard and test different colours? Now, that's what facebook groups are for!

I cut a very crude white surround and painted three different doors. I made a green one because there was a very strong opinion on green.


I now worded my question differently: Which of these doors do you like best? This time nobody voted for white! Isn't it curious? You really need to see it before you can decide. So I dismissed white, and since I wanted the door dark oak from the beginning I made it dark oak. It took five coats of stain to make it this dark, and then I gave it a coat of varnish.


The door handles are pieces of junk jewellery, and the knocker is a bit of an earring.

Now you may ask why I am making these finishing touches when it will be months before I get anywhere near. The answer is: a reward for painting windows.


More floors

This is not the most exciting project, but when I get bored to death of painting windows, I do something else that will need to be done one day. I made another floor with the same technique I have used before, but with a lighter sheet:


It took two or three evenings. I mention this because it looks very easy when it's done, but it does take the time it takes, and you cannot cheat.

With the furniture - but still without wallpaper or even the back wall - it looks like this:


If you haven't seen my blog before, here is how I made the canopy bed, the nightstand, the chest and the portable heater.  The oriental rug is cut from a souvenir purse someone gave me. The washstand is from a flee market, but I made the porcelain in my ceramic class.


Sunday 9 November 2014

A proprietor's concerns

As far as I understand, I am the only owner of this property in the UK and apparently in the whole world. (If someone who reads this owns the new model of Downton Manor, please please contact me). It is of course exciting, but the down side is that there is no one I can ask for advice. Not even the manufacturer because somebody else is assembling the model for them, but they haven't done it yet, therefore there are still, three months after I received the kit, no assembly instructions, and if something is profoundly wrong, which I every now and then suspect, nobody yet knows. Perhaps I should have... but it's pointless to speculate. Here I am, with a tremendously expensive toy that I so far don't quite know how to put together, and if there is another owner (please, please contact me!) we are making our mistakes on our own. The problem is, I don't even know if I am making mistakes. I don't even know whether I have all the parts I am supposed to have.

But I have invested so much in this property. Emotionally of course, all that time I was waiting, against hope, that it would eventually arrive, and now putting all my effort into it, neglecting all other projects for a long time to come. Intellectually, too, because there are so many decisions to make, so many problems to solve, so many ideas to test and dismiss. If I finish it at all some time - I estimate it will take at least a year - people might look at pictures, or the house itself, and say whatever people say in such cases ("Crazy old woman", "How nice", "Wow"), but nobody will know how much is behind the final outcome.

And I am not even mentioning the pecuniar investment. I keep track of all costs involved: paint, tools, spares. I got interior doors for my patience, otherwise they are extra. I didn't get interior doors for the basement so I will have to buy these. I got one double door that was supposed to be the main entrance door, but the package said "Interior door". I need two interior double doors so I tried to find them, first on ebay (no luck), then everywhere else (no luck). I asked the manufacturer who pointed me toward the only place in the UK who sells these door at outrageous price. Or maybe not outrageous. But while I can make all kinds of things from rubbish, I cannot make double doors, Or maybe I could. However, I ordered these doors, adding a substantial chunk to my building budget. it will be interesting to see how much the final project will have cost, again, given that I buy the absolute minimum.

Why am I doing it, you may ask? Sometimes I am asking myself. Initially I meant it to be my retirement project. I hope by the time I retire this project is finished, and then I will have to come up with something else. 

Saturday 8 November 2014

Secret corridors

This is what my basement looked like this morning.


No, there hadn't been an earthquake in Cambridgeshire, but I had taken out back and side walls to paint them. After I had made the marble kitchen floor it was clear that the walls in the best kitchen should be light and unpatterned, and white is the easiest solution. I also wanted to paint the rear corridor which is a bizarre room in the new model of this house. It has side doors from both kitchens and from the entrance hall, and I am not quite sure what the designer had in mind. But I decided I would put in a fake staircase. I obviously cannot make a real staircase because I then would need to cut a stairwell though both the basement roof and the main building's base, and I do not have the skills. But a fake staircase that pretends to lead to a similar rear corridor on the ground floor, this makes sense.

I had been postponing the staircase project because I didn't have the right stain, but yesterday it arrived, just in time for my Friday evening playtime. I had thought that stain would work like sealer, but it didn't. The effing MDF absorbed it all, leaving an untidy, fluffy surface. I checked how my model miniaturist did it, and it felt better to see that she didn't manage it either. But I wasn't prepared to go to the extremes she went to. In such cases, I consult my Facebook groups, and while I was considering all the good advice they gave me, my eyes fell on the roll of self-adhesive shelf sheet which I had bought to make more floors. It was worth a try, and I was quite pleased with the result.


This is not the secret staircase, I just put it into the main house to take a picture. But I was so pleased with the result that I also tried the main staircase.


It needs to be trimmed, but I believe it will work, and I won't have to stain and sand and stain and sand and stain...

This took care of my Friday evening playtime, but today, after I had painted the walls and re-assembled the shell - still not gluing it - I put in the stairs to see what it would be like with the painted back wall.


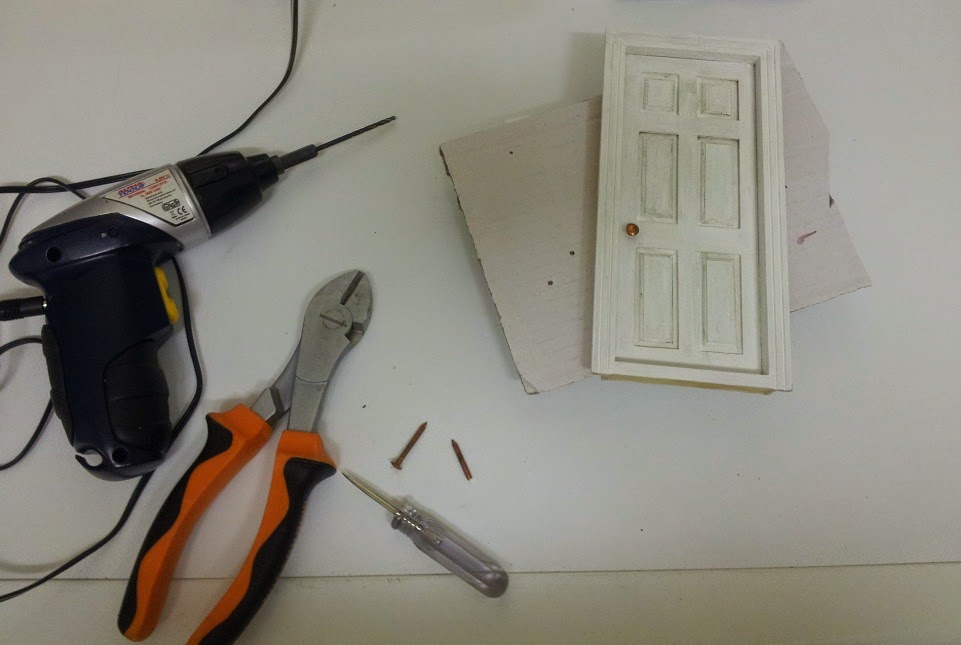
Of course I haven't put back the wallpaper, and the floor isn't finished, but you can see the idea. And as I was watching it I became less and less happy with it. Suddenly the stairs felt too large for the space. And I also realised that in my basement planning I had completely forgotten the wonderful secret door I had in the old Victorian house, the back of an antique photo frame. It would lead from the corridor further down into the (non-existing) cellar.


It creates the same sense of mystery as the stairs, but doesn't take too much space.

While I was at it I also tried to put in a mirror.


Mirrors expand space and create great effects that I have utilised in my van Hoogstraaten room box.

But at the moment I am not sure what I will do. Apart from the view through this door, the corridor, when the basement is finished, will only be visible from side windows, through another door.


It has some potential, but I need to think further. The corridor has to be completed, including lights, before I put on the roof, because there will be no access to it.

Thursday 6 November 2014

Marble tile floor

I found a self-adhesive marble sheet in a thrift store. Great to make kitchen floors.


However, as I have already noticed, you cannot just use a shelf sheet for flooring because the pattern is too large, and it looks unnatural. I wouldn't have minded six years ago, but I do now.

What I did was cut the sheet into 1,5x1,5 cm squares - it was easy, because there is a grid on the back. Then I glued them one by one in a diamond pattern onto an old folder (somebody at my work cleaned their office and threw away dozens of folders. I picked them up, and I now have card in all colours to last me for years).


 Yes, it took me two whole evenings. But it was worth it.


The floor will go into the best kitchen. I think it looks great, but because it is so colourful I believe the walls will have to be white.